Barbecue Bacon Wrapped Chicken Bites


IMG_4513

I love, love my cell phone. I love to be able to check on my children, call whenever I can, text, take pictures. I love it all. What I love less, is the ability to browse the internet. A friend told me that she does not like to go on Facebook because she feels that it swallows her, and that can waste hours in what feels only seconds of her time. I think what i like the least is the ability to get on the internet. Once I get there, I get lost either in the clothes, or in the food… and I spend hours, ….. Do you have that problem???

This recipe is just one of them I saw on Pinterest. I just added mon “petit grain” as we say in French because I did not want to use some of the ingredients and was unable to locate the raspberry Chipotle Sauce as suggested.  I added bits here and there and I am also using my Demarle cookware to cook it ( easy to clean, and non-stick). Of course any pan would do. I hope that you will try them. They cook so fast and are deliiiiiciiouss!!!! Yes, not very healthy but delicious!!!!

IMG_4512 2

Ingredients for about 4-6 people (it is a wide range, but those are so good it is hard to stop at 4 or 5;-)))

  • 2 chicken breasts,
  • 6 bacon strips cut in fourth,
  • 1/3 cup of barbecue sauce,
  • 2-3 tbsp of brown sugar,
  • salt and pepper.
  1. Trim the chicken so that it is cleaned of fat and nerves.IMG_4501
  2. Slice the chicken breast half in its length, then cut each half into small bites of about 1 inch wide ( about 5-6 cut per half).IMG_4502
  3. Season the chicken with salt and pepper.IMG_4503
  4. Then roll each bite within the bacon strip.
    IMG_4504IMG_4505
  5. Place the bacon wrapped chicken into the deep flexipan that you would have placed onto a medium perforated sheet.IMG_4506
  6. Pour the barbecue sauce over the top of the bacon and with a brush, brush evenly the barbecue sauce.IMG_4508
  7. Sprinkle the sugar all over the chickenIMG_4510
  8. and bake the chicken for 30 minutes at 400 or until the bacon is crisp and the fat has melted.IMG_4511 You may cook it longer if you need to, but I was happy with the texture after 30 minutes.IMG_4512 2

Bon Appetit and Happy Cooking!!!

Barbecue Bacon Chicken Bites

  • Servings: 4-6
  • Difficulty: Super Easy
  • Print

IMG_4512 2

Ingredients for about 4-6 people (it is a wide range, but those are so good it is hard to stop at 4 or 5;-)))

  • 2 chicken breasts,
  • 6 bacon strips cut in fourth,
  • 1/3 cup of barbecue sauce,
  • 2-3 tbsp of brown sugar,
  • salt and pepper.
  1. Trim the chicken so that it is cleaned of fat and nerves.
  2. Slice the chicken breast half in its length, then cut each half into small bites of about 1 inch wide ( about 5-6 cut per half).
  3. Season the chicken with salt and pepper.
  4. Then roll each bite within the bacon strip.
  5. Place the chicken into the deep flexipan.
  6. Pour the barbecue sauce over the top of the bacon and with a brush, brush evenly the barbecue sauce.
  7. Sprinkle the sugar all over the chicken and bake the chicken for 30 minutes at 400 or until the bacon is crisp and the grease has melted.

Bon Appetit and Happy Cooking!!!

Strawberries Balls for The Super Bowl


IMG_4522

What type of food are you offering your guests for Super bowl??? Well, if I were hosting, I would be making all kinds of food… But I am not. We will be joining some friends of ours. So Guess what??? I will only be making a few things. Mini Pretzels, Mustard, Ham and Cheese Pretzels Bites and Chocolate Covered Strawberries.

I will be posting those recipes very soon. But today I am just going to share with you the easiest of all desserts: Chocolate Covered Strawberries.

All you need is good quality Chocolate, and fresh strawberries.

IMG_4520

Ingredients for 1 box of chocolate or about 30 strawberries:

  • 1 box of strawberries
  • 6 oz. of bittersweet chocolate from Ghiradhelli
  • 1 0z of white chocolate

I love the Ghiradhelli Chocolate because it is the ONLY chocolate that will melt perfectly to a liquid form in the microwave so Do not use Hershey, or Nestlé. The chocolate will not melt unless you add butter.

  1. Place the chocolate chips in a small bowl. Place the chocolate chips in the microwave for 90 seconds. Stir and place it back into the microwave for 5 to 10 seconds if needed.
  2. Take one strawberry at a time, and dip it in the chocolate. Place the chocolate onto a large silpat that you would have previously placed on a perforated sheet for support. Repeat until it is done.IMG_4471
  3. Place the strawberries into the fridge to cool. When the chocolate has settled.
  4. Place the white chocolate into a small container and melt it the microwave for a few seconds ( 30 seconds). It should soft to the fingers. IMG_4532
  5. Pour the melted chocolate into a small plastic bag. Push the chocolate to the end of the plastic bag.IMG_4533
  6. Cut the tip and draw lines on the strawberries to make it look like the football.IMG_4473
  7. Place the strawberries back into the fridge to cool. Et voila!!!IMG_4519


Bon Appetit and Happy Cooking!!!

Football Strawberries for Super Bowl

  • Servings: 10
  • Difficulty: Super Easy
  • Print

IMG_4522

Ingredients for 1 box of chocolate or about 30 strawberries:

  • 1 box of strawberries
  • 6 oz. of bittersweet chocolate from Ghiradhelli
  • 1-0z of white chocolate
  • 1 plastic bag

I love the Ghiradhelli Chocolate because it is the ONLY chocolate that will melt perfectly to a liquid form in the microwave so Do not use hershey, or Nestlé.

  1. Place the chocolate chips in a small bowl. Place the chocolate chips in the microwave for 90 seconds. Stir and place it back into the microwave for 5 to 10 seconds if needed.
  2. Take one strawberry at a time and dip it in the chocolate. Place the chocolate onto a large silpat that you would have previously placed on a perforated sheet. Repeat until it is done.
  3. Place the strawberries into the fridge to cool. When the chocolate has settled.
  4. Place the white chocolate into a small container and melt it it the microwave for a few seconds ( 30 seconds).
  5. Pour the melted chocolate into a small plastic bag. Push the chocolate to the end of the plastic bag.
  6. Cut the tip and draw lines on the strawberries to make it look like the football.
  7. Place the strawberries back into the fridge to cool. Et voila!!!

Bon Appetit and Happy Cooking!!!

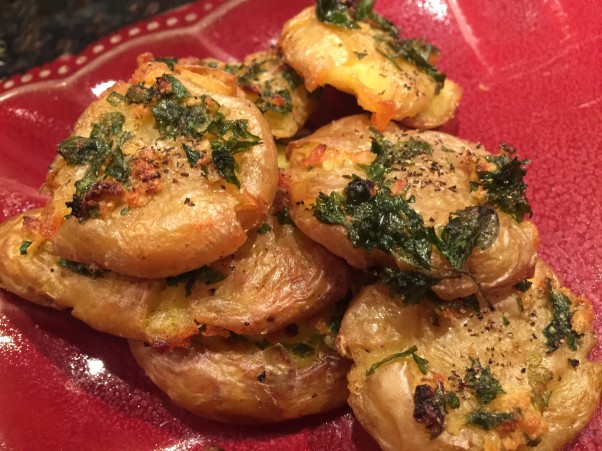
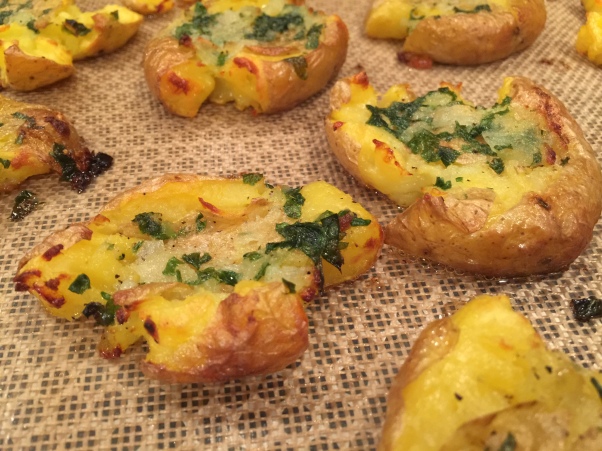
Garlic Smashed Potatoes


IMG_3111 2

When you are married to a German man, and he wants to eat potatoes every evening, or almost every evening, you start being creative on fixing those potatoes. I either use recipes from families, and friends, or make up my own. The recipe that I am presenting to you today was inspired by one that I had seen on pinterest.

I cannot recall which recipe it was, nor who posted it, but I wanted to share with you my twist on it. As it is easy as 1, 2, 3 and it is really delicious!!!!

Ingredients for 4:

  • a bag of small new potatoes
  • olive oil
  • sea salt
  • 2 tbsp of chopped parsley
  • 1 large clove of garlic or 2 small ones

IMG_3097

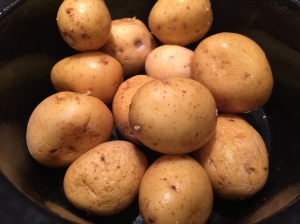
  1. Place the potatoes in the sink and with a small bruch, clean them well.IMG_3068
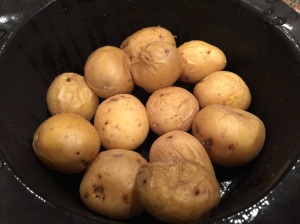
  2. Steam the potatoes for 6 minutes or until  they are somewhat cooked. I use my demarle cookware because it makes my life easy, but you can use any steamer to steam your potatoes.
  3. If using the demarle cookware, place the potatoes inside the large round mold and place the octagonal silpat on top of it. Place the round mold in the microwave and cook the potatoes for 6 minutes. They should be soft, but still firm.IMG_3072
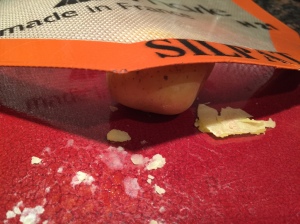
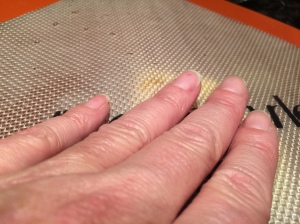
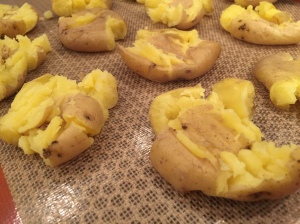
  4. Now, it is time to smash your potatoes. Get a cookie sheet ready by placing a parchment paper, or if you are using a silpat, place the silpat on top of a perforated sheet. Take one potato and smash it with a palm of your hand. I use either a kitchen towel to protect my hand from the heat, or my octagonal silpat.IMG_3107 2IMG_3108 2
  5. Place the smash potato on the cookie sheet, or silpat and repeat until you have exhausted all potatoes.IMG_3074
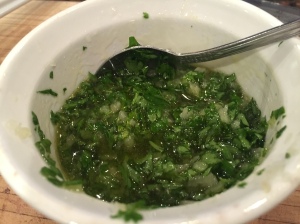
  6. With a knife or  chopper, chop the parsley and the garlic very thinly. I used my Demarle chopper and it does a great job!!!In the demarle chopper, place 1/4 cup of olive oil, the garlic, fresh parsley and chop it all until you have a paste.IMG_3109 2
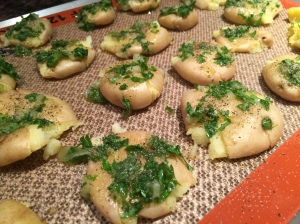
  7. Either with the brush or with a spoon, top each potato with the mixture. Then sprinkle some sea salt and black pepper.IMG_3075IMG_3110 2
  8. Place the potatoes into the oven at 400 and cook them for 15 minutes.IMG_3078

Enjoy!!!

( I don’t usually eat potatoes, but it was very hard to resist those, they were so yummy!!! The garlic gets crunchy, a true “delice”)

Parsley and Roasted Garlic Smashed Potatoes

  • Servings: 6-8
  • Difficulty: Super Easy
  • Print

IMG_3077

Ingredients for 6-8:

  • a bag of small new potatoes
  • olive oil
  • sea salt
  • 2 tbsp of chopped parsley
  • 1 large clove of garlic or 2 small ones
  1. Place the potatoes in the sink and with a small bruch, clean them well.
  2. Steam the potatoes for 6 minutes or until they are somewhat cooked. I use my demarle cookware because it makes my life easy, but you can use any steamer to steam your potatoes.
    If using the demarle cookware, place the potatoes inside the large round mold and place the octagonal silpat on top of it. Place the round mold in the microwave and cook the potatoes for 6 minutes. They should be soft, but still firm.
  3. Now, it is time to smash your potatoes. Get a cookie sheet ready by placing a parchment paper, or if you are using a silpat, place the silpat on top of a perforated sheet.
  4. Take one potato and smash it with a palm of your hand. I use either a kitchen towel to protect my hand from the heat, or my octagonal silpat.
  5. Place the smash potato on the cookie sheet, or silpat and repeat until you have exhausted all potatoes.
  6. With a knife or chopper, chop the parsley and the garlic very thinly. I used my Demarle chopper and it does a great job!!!In the demarle chopper, place 1/4 cup of olive oil, the garlic, fresh parsley and chop it all until you have a paste.
  7. Either with the brush or with a spoon, top each potato with the mixture. Then sprinkle some sea salt and black pepper.
  8. Place the potatoes into the oven at 400 and cook them for 15 minutes.
    Enjoy!!!

( I don’t usually eat potatoes, but it was very hard to resist those, they were so yummy!!! The garlic gets crunchy, a true “delice”)

Bon Appetit and Happy Cooking!!!

Stuffed Zucchini with Roasted Bell Pepper, and Purple Onion


IMG_2804

I love, love vegetables. I love to eat them, but I often find myself at loss on how to prepare them. Of course, you can grill, roast, steam, saute all your vegetables, and you can vary the spices that you use, but I am not very creative when cooking vegetables and like many of you I end up making the same vegetables over and over again.

I cannot remember where I saw a recipe of stuffed zucchinis, but I thought why not stuffed them with vegetables instead of meat to make it a truly vegetable dish. So  here it is :

IMG_2805

Ingredients for 4 :

  • 4 medium sized zucchinis about 4-5 inches long
  • 1 small purple onion
  • 1 whole roasted bell pepper ( a big jar can be found in grocery store or at Costco)
  • 1/2 cup of parmesan,  swiss cheese or even feta ( optional)
  • 1 tsp of demarle rosemary and thyme spice
  • 1/4 tsp of salt
  • 1/8 tsp of pepper
  • 1 tbsp of olive oil

IMG_2883

  1. If you have not purchased roasted bell peppers, you will need to roast the fresh ones yourself. It is quite easy. Since it  just takes times, you may as well prepare a few more to keep in your fridge for more recipes.  Slice the bell peppers in half. Place then onto the silpat skin up, and roast them for 30 minutes at 450. When they are roasted, let them cool first by placing a silpat over them to keep them from drying up. When they are somewhat cooler, place them into a plastic bag and let them cool completely. The reason why you will want to place them into a bag, is to allow them to “perspire” and it will be easier for you to peel the skin off. 
  2. After 30 minutes to an hour, when they are completely cool. Carefully peel of the skin. It should come off fairly easy. Et voila. 
  3. Slice and dice one whole bell pepper and place it into a large bowl.
  4. Rinse the zucchinis thoroughly under running water. Then with a sharp knife, slice the zucchini in half in its length. With a melon grater, or a little spoon, grate the inside of the zucchinis. Place the “meat” of the zucchinis onto a chopping block, and chop the zucchini “meat” finely. Empty it into a bowl where you would have already placed the diced bell pepper. Set aside. IMG_2879
  5. Chop the onion very finely. IMG_2877
  6. In a large saute pan, warm up a tbsp of olive oil and when the oil is warm, saute the onion until it becomes a dark amber color.IMG_2878
  7. Empty the onion in the bowl where you would have placed the zucchini’s “meat”.
  8. Add the salt, pepper, 1 tsp of rosemary and thyme and 1/2 cup of cheese ( optional). Mix well. IMG_2880
  9. Fill the zucchinis with the mixture and place them into a deep flexipan that you would have placed onto a medium perforated sheet. IMG_2951
  10. Cook for 20-30 minutes ( it will depend how big they are. the larger, the longer they will need). Enjoy!!!IMG_2884

Bon Appetit and Happy Cooking!!!

Stuffed Zucchinis with Bell Pepper and Purple Onion

  • Servings: 4-6 people
  • Difficulty: Super easy
  • Print

IMG_2804

Ingredients for 4 :

  • 4 medium-sized zucchinis about 4-5 inches long
  • 1 small purple onion
  • 1 whole roasted bell pepper ( a big jar can be found in grocery store or at Costco)
  • 1/2 cup of parmesan, swiss cheese or even feta ( optional)
  • 1 tsp of demarle rosemary and thyme spice
  • 1/4 tsp of salt
  • 1/8 tsp of pepper
  • 1 tbsp of olive oil
  1. If you have not purchased roasted bell peppers, you will need to roast the fresh ones yourself. It is quite easy. Since it just takes times, you may as well prepare a few more to keep in your fridge for more recipes. Slice the bell peppers in half. Place then onto the silpat skin up, and roast them for 30 minutes at 450. When they are roasted, let them cool first by placing a silpat over them to keep them from drying up. When they are somewhat cooler, place them into a plastic bag and let them cool completely. The reason why you will want to place them into a bag, is to allow them to “perspire” and it will be easier for you to peel the skin off.
  2. After 30 minutes to an hour, when they are completely cool. Carefully peel of the skin. It should come off fairly easy. Et voila.
  3. Slice and dice one whole bell pepper and place it into a large bowl.
  4. Rinse the zucchinis thoroughly under running water. Then with a sharp knife, slice the zucchini in half in its length. With a melon grater, or a little spoon, grate the inside of the zucchini. Place the “meat” of the zucchinis onto a chopping block, and chop the zucchini “meat” finely. Empty it into a bowl where you would have already placed the diced bell pepper. Set aside.
  5. Chop the onion very finely.
  6. In a large saute pan, warm up a tbsp of olive oil and when the oil is warm, saute the onion until it becomes a dark amber color. Empty the onion in the bowl where you would have placed the zucchini’s “meat”.
  7. Add the salt, pepper, 1 tsp of rosemary and thyme and 1/2 cup of cheese ( optional). Mix well.
  8. Fill the zucchinis with the mixture and place them into a deep flexipan that you would have placed onto a medium perforated sheet.
  9. Cook for 20-30 minutes ( it will depend how big they are. the larger, the longer they will need). Enjoy!!!

Bon Appetit and Happy Cooking!!!

Brie Tartlets with Confit Tomatoes


IMG_2644

A friend of mine gave me some baby tomato plants last year, and despite me doing anything this year, they all came back and have given me many tomatoes. Ordinary I would eat the tomatoes off the wine because they are so good, but this particular tomato plant makes tomatoes that are not sweet and so I have to cook them, or accommodate them to eat them. As I was browsing easy vegetables appetizers, I came across a candied tomato recipe from the Power of Family Meal. I changed a few things and here it is:

IMG_2646

Ingredients for 20 medium sized tartlets:

  • 1 box of small baby tomatoes of about 1 pint ( the smaller the better- you really need 20 small tomatoes),
  • 250 gr. or about 10 oz of brie cheese,
  • 1 pie crust,
  • 1/4 cup of balsamic vinegar ( I used the Mediterranean Balsamic with Fig),
  • 2 tbsp of brown sugar.
  • 1/2 tbsp of olive oil.
  • salt and pepper to taste
  1. In a medium saucepan, warm up the oil and when it is sizzling,
  2. Add the tomatoes that you would have cut in half.IMG_2630
  3. Cook them for a minutes or two.IMG_2631
  4. Then add the vinegar and the sugar, a dash of salt and pepper and bring to boil.IMG_2635
  5. Cook for another 1 or 2 minutes. Set aside.
  6. With a cutter, cut the dough to fit the tartlet pan ( you will want to use the medium or the mini muffin pan because the cheese may over flow).
  7. With a shaper, push the dough down. Then with a fork, prick the dough so that the tartlet will stay flat and a pocket will not form at the bottom.
  8. Cut the cheese in 1/2 inch thick slices, then in rectangles of about 1 inch wide.
  9. Squeeze them and place them in each tartlet.
  10. Spoon two halves of tomatoes in each brie tartlets.IMG_2530
  11. Cook the tartlets in the oven at 400 for 15 minutes.
  12. Meanwhile place the saucepan back on the stove to reduce the liquid to about half. When the tartlets are cooked, and removed from the oven, drizzle some of that juice on top of the tartlets and eat ;-))IMG_2645

Bon Appetit and Happy Cooking!!!

Brie Tartlets with Confit Tomatoes

  • Servings: 7-10 people
  • Difficulty: Super easy
  • Print

IMG_2646

Ingredients for 20 medium sized tartlets:

  • 1 box of small baby tomatoes of about 1 pint ( the smaller the better- you really need 20 small tomatoes),
  • 250 gr. or about 10 oz of brie cheese,
  • 1 pie crust,
  • 1/4 cup of balsamic vinegar ( I used the Mediterranean Balsamic with Fig),
  • 2 tbsp of brown sugar.
  • 1/2 tbsp of olive oil.
  • salt and pepper to taste
  1. In a medium saucepan, warm up the oil and when it is sizzling,
  2. Add the tomatoes that you would have cut in half.
  3. Cook them for a minutes or two.
  4. Then add the vinegar and the sugar, a dash of salt and pepper and bring to boil.
  5. Cook for another 1 or 2 minutes. Set aside.
  6. With a cutter, cut the dough to fit the tartlet pan ( you will want to use the medium or the mini muffin pan because the cheese may over flow),
  7. With a shaper, push the dough down. Then with a fork, prick the dough so that the tartlet will stay flat and a pocket will not form at the bottom.
  8. Cut the cheese in 1/2 inch thick slices, then in rectangles of about 1 inch wide. Squeeze them and place them in each tartlet.
  9. Spoon two halves of tomatoes in each brie tartlets.
  10. Cook the tartlets in the oven at 400 for 15 minutes.
  11. Meanwhile place the saucepan back on the stove to reduce the liquid to about half.
  12. When the tartlets are cooked, and removed from the oven, drizzle some of that juice on top of the tartlets and eat ;-))

Bon Appetit and Happy Cooking!!!

Roasted Mushrooms and Asparagus


IMG_1847


One of the thing that I hear often from my customers and cooking classes participants is that they do not know what to cook. Ladies, cooking does not need to be a challenge! It does not have to be difficult. On the contrary. If you can buy fresh vegetables in seasons, then you will be able to vary your meals and eat healthy. Most seasonal vegetables and fruits are so flavorful as they come, that little needs to be done to make them taste great. Today I wanted to offer you this easy side. It is delicious, quick to make and so so healthy. Plus, look at the colors, don’t you want to just get a fork and dig in????

Ingredients for 4-6 people:

  • 1 asparagus bundle
  • 1-2 packs of mushrooms of 8 0z. each
  • 1 tsp of olive oil
  • 1 tsp of fresh thyme chopped ( if you do not have 1/2 tsp of dry thyme)
  • salt and pepper to taste ( a dash of each)

IMG_1836

  1. Place the vegetables in a large colander, and rinse the vegetables thoroughly under running water.
  2. Break the end of the asparagus by holding the asparagus at 3/4 and at the end, and bend until it breaks. ( by doing so you will be sure that your asparagus are not chewy, but tender).
  3. Then chop them in 1/2 inch. Set them aside in a large bowl.IMG_1839
  4. Cut the tails of the mushrooms and cut them in half or even quarters if they are too large.IMG_1838
  5. Add them to the asparagus.
  6. Drizzle the 1 tsp of olive oil and mix well to coat the vegetable well.
  7. Lay the vegetables on top of the silpat. Sprinkle some salt, pepper and the chopped thyme.IMG_1843 2
  8. Cook the vegetables for 5-7 minutes at 400.IMG_1844

9. Enjoy!!!IMG_1847

( And give it a try! Even those who came to my cooking class and who did not like mushroom or asparagus enjoyed it very much and even went for second;-)

Bon Appetit and Happy Cooking!!!

Roasted Mushroom and Asparagus

  • Servings: 4-6 people
  • Difficulty: Super easy
  • Print

IMG_1848

Ingredients for 4-6 people:

  • 1 asparagus bundle
  • 1-2 packs of mushrooms of  8 oz. each
  • 1-2 tbsp of olive oil
  • 1 tsp of fresh thyme chopped ( if you do not have 1/2 tsp of dry thyme)
  • salt and pepper to taste ( a dash of each)


  1. Place the vegetables in a large colander, and rinse the vegetables thoroughly under running water.
  2. Break the end of the asparagus by holding the asparagus at 3/4 and at the end and bend until it breaks. ( by doing so you will be sure that your asparagus are not chewy, but tender).
  3. Then chop them in 1/2 inch. Set them aside in a large bowl.
  4. Cut the tails of the mushrooms and cut them in half or even quarters if they are too large. Add them to the asparagus.
  5. Drizzle the 1 tsp of olive oil and mix well to coat the vegetable well.
  6. Lay the vegetables on top of the silpat. Sprinkle some salt, pepper and the chopped thyme.
  7. Cook the vegetables for 5-7 minutes or to your liking.

Bon Appétit and Happy Coooking!!!

Cooking Classes for the Month of August


IMG_0030

This month, I will offering a limited amount of cooking class partly due to the return of school.

Please join me for some fun time and for some yummy food!

  1. Tuesday, August 11th at 6:30 ( easy dinner ideas)
  2. Thursday, August 27th at 6:30 ( easy dinner ideas)
  3. Saturday, August 29th at 11:30 ( easy dinner ideas)

Sample Menu of one of my latest Easy Dinner presented in July

  • Smoked Salmon Mousse on Canape
  • Brie Tartlet with a Candied Tomatoes Compote
  • Spiced and Maple Coated Salmon with Red pepper and Purple Onion Relish
  • Roasted Tomatoes a la Provencale
  • Toasted Pine Nuts Couscous
  • Meyer Lemon and Raspberry Mousse Bar
  • In this class format, you will have a chance to sit, relax and learn many tips from your instructor. I will demonstrate how to make the recipes and you will enjoy a generous tasting of all the recipes we are making.

( For regulars $25. The fee is waived if a purchase of Demarle cookware is placed of +$60). Does not apply to the class at the Culinary Hub.

You may RSVP at cecile.cuisine@yahoo.com, or call 864-494-4494.

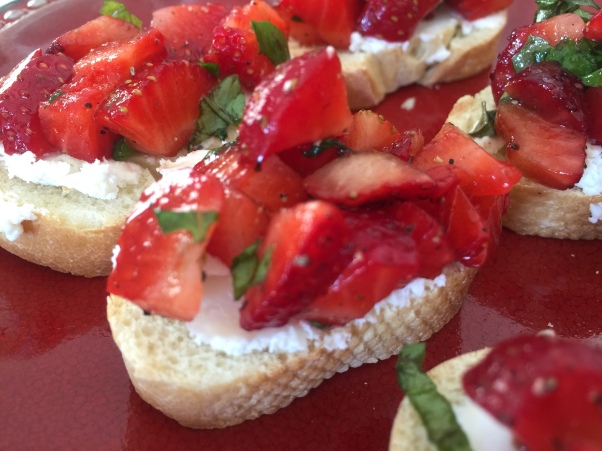
Strawberry Bruchetta


IMG_1834

Ahh  Summer, so much vegetables and fruits to eat!! Everything looks delicious, it is really difficult not to purchase all that looks appetizing and that smells so delicious…

I am lucky to live in a location where we have tons of farmers and tons of local produces. Though it is a tad difficult to go to the produce market during the school year, I have enjoyed going these past few weeks. Everything smells so good in that store, that it is very tempting to buy everything that is at your fingertips;-)

Last time I went there, a couple of days ago, I bought a few peaches, a cantaloupe, a few red tomatoes and a gallon of strawberries. Yes, a gallon… That is a lot  I know, but I intended to use them in my morning shakes, eat them for a snack during the day, and give some away. I wanted to give some away to my mother-in-law, but when I went to here house, I saw that she, too, had purchased a gallon of strawberries … so I had to take mine back home and figure out what to do with them before they got spoiled.

Really, what can you do with strawberries?? especially a gallon of strawberries??? Of course you can make fruit salads, jams, tarts, cream, ice-creams and many, many more desserts!

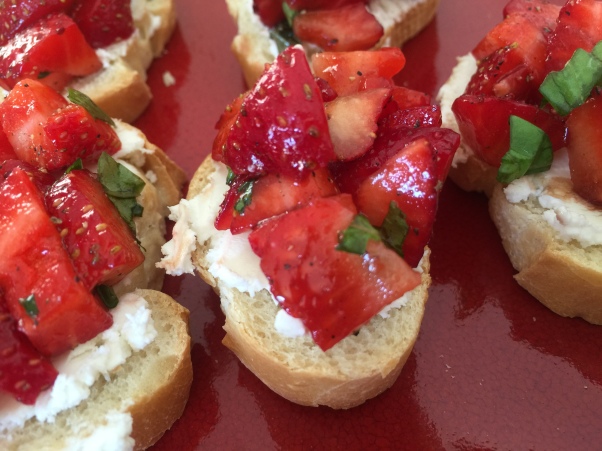
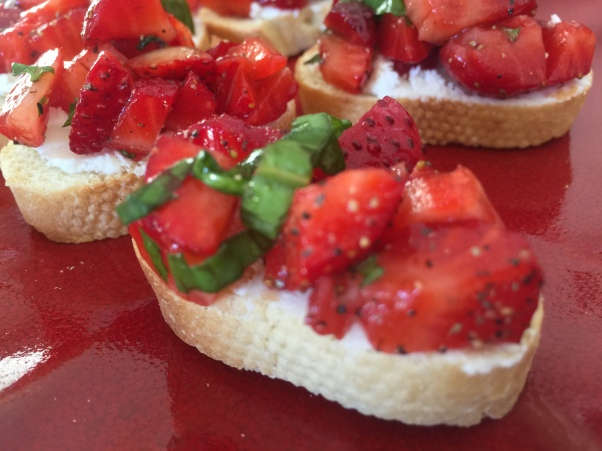
I wanted to use them otherwise than as a dessert so I decided to make a Strawberry Bruchetta. It is actually quite easy to make, fast, inexpensive and it is beautiful to the eyes and your tastebuds;-) You would think that it is too sweet, but the tang of the goat cheese, and the fact that the strawberries are seasoned with vinegar, salt, and pepper, it makes them taste almost unsweetened. It was a delight for me;-) I dare you to try;-)

IMG_1831

Ingredients to make 30-40 individual pieces:

  • 1 French baguette sliced thinly,
  • 1 log of goat cheese at room temperature ( about 6 oz.)
  • 1 pint of fresh strawberries ( use local ones if you can, they taste so much better),
  • 1 tbsp of basil olive oil, I used the Demarle Basil olive oil.
  • 1 tbsp of traditional balsamic vinegar,
  • 1 tbsp of fresh basil chopped.
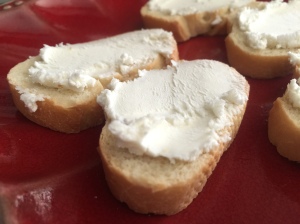
  1. Slice the baguette thinly, and place it on top of the silpain atop a medium perforated sheet. If you do not have either, place the bread onto a cookie sheet. 
  2. Cook the slices for 5-7 minutes or until they are crisp on both sides.
  3. Meanwhile, prepare the strawberry topping. Chop the strawberries and place them into a medium-sized bowl.
  4. Add 1 tbsp of olive oil, and balsamic vinegar, a dash of salt and of pepper, the chopped basil and mix well.IMG_1828
  5. When the sliced baguette are crispy, remove them from the oven and let them cool down.
  6. Spread the cheese over the baguette.IMG_1827
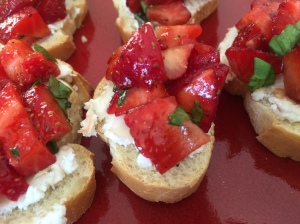
  7. And spoon a bit of the strawberry mixture atop the cheese. Eat right away;-))) Miam.IMG_1832

Bon Appetit and Happy Cooking!!!

Strawberry Bruchetta

  • Servings: 8-10 people
  • Difficulty: Super easy
  • Print

IMG_1831

Ingredients to make 30-40 individual pieces:

  • 1 French baguette sliced thinly,
  • 1 log of goat cheese at room temperature ( about 6 oz. )
  • 1 pint of fresh strawberries ( use local ones if you can, they taste so much better),
  • 1 tbsp of basil love oil, I used the Demarle Basil olive oil.
  • 1 tbsp of traditional balsamic vinegar,
  • 1 tbsp of fresh basil chopped.
  1. Slice the baguette thinly, and place it on top of the silpain atop a medium perforated sheet. If you do not have either, place the bread onto a cookie sheet.  
  2. Cook the slices for 5-7 minutes, or until they are crisp on both sides.
  3. Meanwhile, prepare the strawberry topping. Chop the strawberries and place them into a medium-sized bowl.
  4. Add 1 tbsp of olive oil, and balsamic vinegar, a dash of salt and of pepper, the chopped basil and mix well.
  5. When the sliced baguette are crispy, remove them from the oven and let them cool down.
  6. Spread the cheese over the baguette.
  7. And spoon a bit of the strawberry mixture atop the cheese.
  8. Eat right away;-))) Miam.

Bon Appetit and Happy Cooking!!!

Salmon, Chives and Cream Cheese Canapé


IMG_0014

What to do for appetizers when you have a few people over and don’t want to serve the boring dip, salsa and chips?? you make those really fancy appetizers. They are pretty, taste wonderful and will impress any crowd.

Ingredients for 12 canapes:

  • 1 sheet of puff pastry,
  • 1 pack of smoked salmon,
  • cream cheese at room temperature,
  • fresh dill or chives chopped,
  • coarse black pepper.
  1. Place the puff pastry onto the silpat.
  2. With the rolling pin, roll it thinner ( not too much, just a bit).
  3. Cut the rectangle into 12 squares ( or smaller if you want to make bit sizes).
  4. With a butter knife, spread the cream cheese in the middle of each square.
  5. Place 2 slices of salmon a top the cream cheese.IMG_0008
  6. Sprinkle some dill or chives. Fold the two sides over the salmon. It will look like a diamond.
  7. Sprinkle some coarse pepper. Continue this process until you have used all the puff pastry. Place the canapé on a silpat that you would have previously placed atop a medium perforated sheet.IMG_0009
  8. Cook in warm oven at 400 for 15 minutes. Miam, Miam…IMG_0013

Bon Appetit and Happy Cooking!!!

Smoked Salmon, Chives and Cream Cheese Canape

  • Servings: 6 people
  • Difficulty: Super Easy
  • Print

IMG_0014

Ingredients for 12 canapes:

  • 1 sheet of puff pastry,
  • 1 pack of smoked salmon,
  • cream cheese at room temperature,
  • fresh dill or chives chopped,
  • coarse black pepper.
  1. Place the puff pastry onto the silpat.With the rolling pin, roll it thinner ( not too much, just a bit).
  2. Cut the rectangle into 12 squares ( or smaller if you want to make bit sizes).
  3. With a butter knife, spread the cream cheese in the middle of each square.
  4. Place 2 slices of salmon a top the cream cheese.
  5. Sprinkle some dill or chives.
  6. Fold the two sides over the salmon. It will long like a diamond.
  7. Sprinkle some coarse pepper. Continue this process until you have used all the puff pastry.
  8. Place the canapé on a silpat that you would have previously placed atop a medium perforated sheet.
  9. Cook in warm oven at 400 for 15 minutes. Miam, Miam..

Bon Appetit and Happy Cooking!!!

Bacon, Parmesan and Beef Meatballs


IMG_1778

Summer is here, and with it my summer vacation. One of the many perks of being a teacher is to have a very long summer vacation. And I am really enjoying it. No longer 5:00 am wake up calls, and no longer rush, rush, rush in the morning;-). It is gym in the mornings, lunches with friends, shopping here and there, and sunbathing;-))).

You would think that with all this free time on my hand, I would be bored and would have plenty of time cooking but between the gym, the kids and other things the day is passing by too quickly!!! And with the beautiful weather outside, I don’t really feel staying enclosed in my kitchen cooking dinner…

But dinner needs to be made….So why don’t I share with you another of my quick and delicious recipes; Bacon, Parmesan and Beef Meatballs;-))) You will just love it!!!

IMG_1773

Ingredients for the meatballs to serve 6-8 people ( about 5-6 meatballs per person):

  • 2 lbs of ground beef
  • 3/4 cup of parmesan shredded
  • 3/4 cup of bacon bits
  • 3/4 cup of bread crumbs
  • 1 tbsp of fresh oregano chopped
  • 1/4 tsp of cayenne pepper
  • 1/8 tsp of pepper
  • 1/2 tsp of garlic salt
  • 2 eggs
  • 2 cans of 24 oz. of tomato sauce ( I used from Barilla )

Mashed Potatoes:

  • 6 medium-sized potatoes
  • 2 cloves of garlic
  • 1 cup of italian cheese
  • 2 cups of milk, or cream
  • 1/2 tsp of salt
  • 1/4 tsp of pepper
  1. Place all the ingredients listed for the meatballs except the tomato sauce in a large bowl.
  2. Either  with your  hands, or a kitchen mixer mix everything.IMG_1763
  3. With a small cake scoop, make meatballs.IMG_1764
  4. Place the meatballs into a pan of your choice. I used the deep flexipan from Demarle. I like those pans because they are non-stick and clean so well.IMG_1765
  5. Cook the meatballs for 10-15 minutes at 400.IMG_1807 2
  6. Then transfer the meatballs into a large casserole pan of your choice. I used  the grande round from Demarle  that I placed onto a medium perforated sheet for support, and pour 2 cans of tomato sauces of any flavors.IMG_1768
  7. Place the meatballs back into the oven and cook them for another 10-15 minutes.IMG_1771
  8. Meanwhile prepare the sides of your choice. I decided to fix garlic and italian cheese mashed potatoes.
  9. Peel the potatoes, and dice them. You can either place the potatoes into a large pot, cover them with water, add 1 tsp of sea salt,  and cook them until they are soft.  For an easier solution, you can place the diced potatoes into a large round mold.IMG_1769
  10. Add the pressed garlic, then place the octogonal silpat atop the round mold, and microwave the potatoes for 15 minutes.
  11. When the potatoes are soft, drain the water, mash them. Then add the cheese, the milk or the cream and whip them.IMG_1772
  12. Spoon the potatoes on each plate and place the meatballs atop the mashed potatoes. Sprinkle some cheese, and enjoy!!! Miam…IMG_1774

Bon Appetit and Happy Cooking!!!

Bacon, Oregano and Parmesan Beef Meatballs

  • Servings: 6-8 people
  • Difficulty: Very easy
  • Print

IMG_1778

Ingredients for the meatballs to serve 6-8 people:

  • 2 lbs of ground beef
  • 3/4 cup of parmesan
  • 3/4 cup of bacon bits
  • 3/4 cup of bread crumbs
  • 1 tbsp of fresh oregano chopped
  • 1/4 tsp of cayenne pepper
  • 1/8 tsp of pepper
  • 1/2 tsp of garlic salt
  • 2 eggs
  • 2 cans of 24 oz. of tomato sauce ( I used  Barilla )

Mashed Potatoes:

  • 6 medium sized potatoes
  • 2 cloves of garlic
  • 1 cup of italian cheese
  • 2 cups of milk, or cream
  • 1/2 tsp of salt
  • 1/4 tsp of pepper
  1. Place all the ingredients listed for the meatballs except the tomato sauce in a large bowl.
  2. Either with your hands, or a kitchen mixer mix everything.
  3. With a small cake scoop, make meatballs.
  4. Place the meatballs into a pan of your choice. I used the deep flexipan from Demarle. I like those pans because they are non-stick and clean so well.
  5. Cook the meatballs for 10-15 minutes at 400.
  6. Then transfer the meatballs in the grande round from Demarle that I placed onto a medium perforated sheet for support, and pour 2 cans of tomato sauces of any flavors.
  7. Place the meatballs back into the oven and cook them for another 10-15 minutes.
  8. Meanwhile prepare the sides of your choice. I decided to fix garlic and italian cheese mashed potatoes.
  9. Peel the potatoes, and dice them. You can either place the potatoes into a large pot, cover them with water, add 1 tsp of sea salt, and cook them until they are soft. For an easier solution, you can place the diced potatoes into a large round mold.
  10. Add the pressed garlic, then place the octogonal silpat atop the round mold, and microwave the potatoes for 15 minutes.
  11. When the potatoes are soft, drain the water, mash them. Then add the cheese, the milk or the cream and whip them.
  12. Spoon the potatoes on each plate and place the meatballs atop the mashed potatoes. Sprinkle some cheese, and enjoy!!! Miam…

Bon Appetit and Happy Cooking!!!