Brie Tartlets with Confit Tomatoes


IMG_2644

A friend of mine gave me some baby tomato plants last year, and despite me doing anything this year, they all came back and have given me many tomatoes. Ordinary I would eat the tomatoes off the wine because they are so good, but this particular tomato plant makes tomatoes that are not sweet and so I have to cook them, or accommodate them to eat them. As I was browsing easy vegetables appetizers, I came across a candied tomato recipe from the Power of Family Meal. I changed a few things and here it is:

IMG_2646

Ingredients for 20 medium sized tartlets:

  • 1 box of small baby tomatoes of about 1 pint ( the smaller the better- you really need 20 small tomatoes),
  • 250 gr. or about 10 oz of brie cheese,
  • 1 pie crust,
  • 1/4 cup of balsamic vinegar ( I used the Mediterranean Balsamic with Fig),
  • 2 tbsp of brown sugar.
  • 1/2 tbsp of olive oil.
  • salt and pepper to taste
  1. In a medium saucepan, warm up the oil and when it is sizzling,
  2. Add the tomatoes that you would have cut in half.IMG_2630
  3. Cook them for a minutes or two.IMG_2631
  4. Then add the vinegar and the sugar, a dash of salt and pepper and bring to boil.IMG_2635
  5. Cook for another 1 or 2 minutes. Set aside.
  6. With a cutter, cut the dough to fit the tartlet pan ( you will want to use the medium or the mini muffin pan because the cheese may over flow).
  7. With a shaper, push the dough down. Then with a fork, prick the dough so that the tartlet will stay flat and a pocket will not form at the bottom.
  8. Cut the cheese in 1/2 inch thick slices, then in rectangles of about 1 inch wide.
  9. Squeeze them and place them in each tartlet.
  10. Spoon two halves of tomatoes in each brie tartlets.IMG_2530
  11. Cook the tartlets in the oven at 400 for 15 minutes.
  12. Meanwhile place the saucepan back on the stove to reduce the liquid to about half. When the tartlets are cooked, and removed from the oven, drizzle some of that juice on top of the tartlets and eat ;-))IMG_2645

Bon Appetit and Happy Cooking!!!

Brie Tartlets with Confit Tomatoes

  • Servings: 7-10 people
  • Difficulty: Super easy
  • Print

IMG_2646

Ingredients for 20 medium sized tartlets:

  • 1 box of small baby tomatoes of about 1 pint ( the smaller the better- you really need 20 small tomatoes),
  • 250 gr. or about 10 oz of brie cheese,
  • 1 pie crust,
  • 1/4 cup of balsamic vinegar ( I used the Mediterranean Balsamic with Fig),
  • 2 tbsp of brown sugar.
  • 1/2 tbsp of olive oil.
  • salt and pepper to taste
  1. In a medium saucepan, warm up the oil and when it is sizzling,
  2. Add the tomatoes that you would have cut in half.
  3. Cook them for a minutes or two.
  4. Then add the vinegar and the sugar, a dash of salt and pepper and bring to boil.
  5. Cook for another 1 or 2 minutes. Set aside.
  6. With a cutter, cut the dough to fit the tartlet pan ( you will want to use the medium or the mini muffin pan because the cheese may over flow),
  7. With a shaper, push the dough down. Then with a fork, prick the dough so that the tartlet will stay flat and a pocket will not form at the bottom.
  8. Cut the cheese in 1/2 inch thick slices, then in rectangles of about 1 inch wide. Squeeze them and place them in each tartlet.
  9. Spoon two halves of tomatoes in each brie tartlets.
  10. Cook the tartlets in the oven at 400 for 15 minutes.
  11. Meanwhile place the saucepan back on the stove to reduce the liquid to about half.
  12. When the tartlets are cooked, and removed from the oven, drizzle some of that juice on top of the tartlets and eat ;-))

Bon Appetit and Happy Cooking!!!

Soft Balls for the Superbowl;-)


IMG_1091

To keep with the news, why not make soft balls for the Superbowl:-)

I am just kidding. But since this year Superbowl is all about soft and spongy balls, we decided to bring this time not a Super Bowl cake, but molten chocolate mini cakes.

Ingredients for 40 mini footballs:

  • 5 eggs
  • 2 sticks of unsalted butter
  • 8 oz of good quality chocolate ( ghiradhelli)
  • 1/2 cup of sugar
  • icing of your choice to make the lines on the cheese
  1. Place the chocolate and the butter in a small bowl and microwave it for 90 seconds. IMG_1078
  2. Meanwhile, beat the sugar and the eggs together a few strokes ( enough so you will not see the sugar any more.)IMG_1077
  3. Mix the butter and the chocolate chips so that it will look like syrup. IMG_1079
  4. Pour the chocolate mixture into the egg mixture and stir. IMG_1080
  5. At first it will be very liquid, but as you stir, it will become thicker and looks like goo. IMG_1081
  6. Pour the mixture into the mold of your choice. I chose the quenelle mold, but you can use the mini muffin mold. IMG_1083
  7. If you choose this mold, cook the cakes for 5 minutes for 400. IMG_1085
  8. Let the cakes cool completely in the mold until they are cold. IMG_1087
  9. Unmold them, and decorate them as you wish. I chose brown icing to make the lace of the balls. IMG_1089Enjoy!!!

Soft SuperBowls

  • Servings: 10-20 people
  • Difficulty: Super Easy
  • Print

IMG_1089

Ingredients for 40 mini footballs:

  • 5 eggs
  • 2 sticks of unsalted butter
  • 8 oz of good quality chocolate ( ghiradhelli)
  • 1/2 cup of sugar
  • icing of your choice to make the lines on the cheese
  1. Place the chocolate and the butter in a small bowl and microwave it for 90 seconds.
  2. Meanwhile, beat the sugar and the eggs together a few strokes ( enough so you will not see the sugar any more.)
  3. Mix the butter and the chocolate chips so that it will look like syrup.
  4. Pour the chocolate mixture into the egg mixture and stir.
  5. At first it will be very liquid, but as you stir, it will become thicker and looks like goo.
  6. Pour the mixture into the mold of your choice. I chose the quenelle mold, but you can use the mini muffin mold.
  7. If you choose this mold, cook the cakes for 5 minutes for 400.
  8. Let the cakes cool completely in the mold until they are cold.
  9. Unmold them, and decorate them as you wish. I chose brown icing to make the lace of the balls.Enjoy!!!

Bon Appetit and Happy Cooking!!!

If you like what you read or see, please share;-) Merci beaucoup!!!

Chinese Fortune Cookies


photo 4

A  few Thursdays ago,  I hosted an Asian Cooking Class for a fun group of women. Not only did we have a lot of fun, but we also learned to make many yummy recipes. Our menu consisted of Pot Stickers, Teriyaki Chicken, Sesame Infused Broccoli, Coconut Rice and Fortune Cookies. Yes, we made fortune cookies;-)

Did you know however not all Chinese restaurants offer Chinese Fortune cookies?!?! Yes. it is true. I learned the night of the cooking class that  Fortune Cookies were An American tradition. Yep, it is true!!

photo 3

According to Wikepedia, “Fortune cookies are often served as a dessert in Chinese restaurants in the United States and some other countries, but are absent in China. The exact origin of fortune cookies is unclear, though various immigrant groups in California claim to have popularized them in the early 20th century, basing their recipe on a traditional Japanese cracker. Fortune cookies have been summarized as being “introduced by the Japanese, popularized by the Chinese, but ultimately … consumed by Americans.

As far back as the 19th century, a cookie very similar in appearance to the modern fortune cookie was made in Kyoto, Japan, and there is a Japanese temple tradition of random fortunes, called o-mikuji. The Japanese version of the cookie differs in several ways: they are a little bit larger; are made of darker dough; and their batter contains sesame and miso rather than vanilla and butter. They contain a fortune; however, the small slip of paper was wedged into the bend of the cookie rather than placed inside the hollow portion. This kind of cookie is called tsujiura senbei (辻占煎餅?) and are still sold in some regions of Japan, especially in Kanazawa, Ishikawa as the lucky items to start Happy New Year.Some said that it’s sold in the neighborhood of Fushimi Inari-taisha shrine in Kyoto.

Most of the people who claim to have introduced the cookie to the United States are Japanese, so the theory is that these bakers were modifying a cookie design which they were aware of from their days in Japan.

Makoto Hagiwara of Golden Gate Park’s Japanese Tea Garden in San Francisco is reported to have been the first person in the USA to have served the modern version of the cookie when he did so at the tea garden in the 1890s or early 1900s. The fortune cookies were made by a San Francisco bakery, Benkyodo.[4][5][6]

David Jung, founder of the Hong Kong Noodle Company in Los Angeles, has made a competing claim that he invented the cookie in 1918.San Francisco’s mock Court of Historical Review attempted to settle the dispute in 1983. During the proceedings, a fortune cookie was introduced as a key piece of evidence with a message reading, “S.F. Judge who rules for L.A. Not Very Smart Cookie”. A federal judge of the Court of Historical Review determined that the cookie originated with Hagiwara and the court ruled in favor of San Francisco. Subsequently, the city of Los Angeles condemned the decision.[7]

Seiichi Kito, the founder of Fugetsu-do of Little Tokyo in Los Angeles, also claims to have invented the cookie.[8] Kito claims to have gotten the idea of putting a message in a cookie from Omikuji (fortune slip) which are sold at temples and shrines in Japan. According to his story, he sold his cookies to Chinese restaurants where they were greeted with much enthusiasm in both the Los Angeles and San Francisco areas. Thus Kito’s main claim is that he is responsible for the cookie being so strongly associated with Chinese restaurants.”

I felt a bit silly for proposing to make them, but we had much fun making them nonetheless;-)

Well, for fun, you certainly can make them too. They are much more yummy than the real ones served at Chinese restaurants.

Ingredients for about 16 biscuits:

  • 2 large egg whites
  • 1/2 teaspoon pure vanilla extract
  • 1/2 teaspoon pure almond extract
  • 3 tablespoons vegetable oil
  • 8 tablespoons all-purpose flour
  • 1 1/2 teaspoons cornstarch
  • 1/4 teaspoon salt
  • 8 tablespoons granulated sugar
  • 3 teaspoons water
  1. Turn the oven to 375.
  2. Place a medium silpat onto a medium perforated sheet and set aside.
  3. In a medium bowl, lightly beat the egg white, vanilla extract, almond extract and vegetable oil.
  4. Add the water and mix well again.
  5. In another bowl, mix all the dry ingredients ( flour, cornstarch, salt and sugar).
  6. Add the flour into the egg white mixture and stir until you have a smooth batter. The batter should not be runny, but should drop easily off a wooden spoon.photo 1
  7. Using 1 tablespoon drop the batter onto the silpat, that you would have placed on a large perforated sheet,  and with the back of the spoon, spread the batter into an even 2 1/2 inch wide circle. photo 2Only make 3 to 4 cookies at a time because they will cool too quickly, and you will not be able to shape them if you make too many at a times.
  8. Bake until the outer 1/2-inch of each cookie turns golden brown and they are easy to remove from the baking sheet with a spatula (between 8 and 10 minutes).
  9. Working quickly, remove the cookie with a spatula and flip it over in your hand. Place a fortune in the middle of a cookie. To form the fortune cookie shape, fold the cookie in half, then gently pull the edges downward over the rim of a glass, wooden spoon or the edge of a muffin tin. Place the finished cookie in the cup of the muffin tin so that it keeps its shape. photo 3Continue with the rest of the cookies.
  10. Repeat step 7-9 until you have used all the batter. Yum!!! The cookies will keep for a week in an airtight container. photo 1

Bon Appetit and Happy Cooking!!!

Chinese Fortune Cookies

  • Servings: 3 to 4 persons
  • Difficulty: Easy
  • Print

photo 4

Ingredients for about 16 biscuits:

  • 2 large egg whites
  • 1/2 teaspoon pure vanilla extract
  • 1/2 teaspoon pure almond extract
  • 3 tablespoons vegetable oil
  • 8 tablespoons all-purpose flour
  • 1 1/2 teaspoons cornstarch
  • 1/4 teaspoon salt
  • 8 tablespoons granulated sugar
  • 3 teaspoons water
  1. Turn the oven to 375.
  2. Place a medium silpat onto a medium perforated sheet and set aside.
  3. In a medium bowl, lightly beat the egg white, vanilla extract, almond extract and vegetable oil.
  4. Add the water and mix well again.
  5. In another bowl, mix all the dry ingredients ( flour, cornstarch, salt and sugar).
  6. Add the flour into the egg white mixture and stir until you have a smooth batter. The batter should not be runny, but should drop easily off a wooden spoon.
  7. Using 1 tablespoon drop the batter onto the silpat, and with the back of the spoon, spread the batter into an even 2 1/2 inch wide circle. Only make 3 to 4 cookies at a time because they will cool too and you will not be able to shape them if you make too many.
  8. Bake until the outer 1/2-inch of each cookie turns golden brown and they are easy to remove from the baking sheet with a spatula (between 8 and 10 minutes).
  9. Working quickly, remove the cookie with a spatula and flip it over in your hand. Place a fortune in the middle of a cookie.
  10. To form the fortune cookie shape, fold the cookie in half, then gently pull the edges downward over the rim of a glass, wooden spoon or the edge of a muffin tin. Place the finished cookie in the cup of the muffin tin so that it keeps its shape. Continue with the rest of the cookies.
    Repeat step 7-9 until you have used all the batter. Yum!!! The cookies will keep for a week in an airtight container.

Bon Appetit and Happy Cooking!!!

Homemade Bounty


photo 2
In the evening, after dinner, my husband likes to fix himself a cup of coffee, and sit on his sofa to watch a movie. He also likes to eat “a betthupfer” ( evening treat)  while watching his movie. It can be an ice-cream, a dessert that I made, a chocolate bar, or even a bag of those miniature candy bars ( Milkie way, Twix, Almond joy).

As I was scrolling through the internet in search of ideas for my cooking classes, I came across the Almond Joy, or Bounty recipe. It looked so easy that, of course, i could not pass it. So Here it is:

For About 30 small bounty:

  • 1 can of condensed Milk
  • 300 gr. of coconut flakes
  • Chocolate Chips
  1. In a large bowl mix the coconut flakes and the condensed milk, and mix well.photo 1
  2. With a small spoon, pick a tablespoon of that mixture and mold it into a small oval that you will place on the silpat that you would have placed on a large perforated sheet. Continue until all has been used.photo 1
  3. Place them into the freezer to freeze for a minimum of an hour.
  4. When the coconut is hard, place the chocolate into a microwable bowl and cook it for 90 seconds. Stir with a fork. If needed, cook for another 30 seconds or until the chocolate is liquid.
  5. Place a coconut oval onto a fork and dip it into the melted chocolate. Place the chocolate covered coconut onto the silpat again. Place the tray back into the freezer so that the chocolate will cure.

Or

  1. With a pastry brush, “paint” the inside of the mold of your choice. I used two trays: the oval tray and the pop tray. Place the tray into the fridge, or freezer to cure the chocolate.photo
  2. Meanwhile, prepare the filling. Mix together the coconut flakes and the condensed milk and fill the cavities of the tray. photo 2
  3. Place the tray back into the freezer. Let it rest for 30 minutes to an hour or until the coconut is frozen.
  4. With the pastry brush, brush the top of the coconut, and voila!!!photo 3
  5. Cheap Home-made Bounty. Yummm!!! You try!photo

Bon Appetit and Happy Cooking!!!


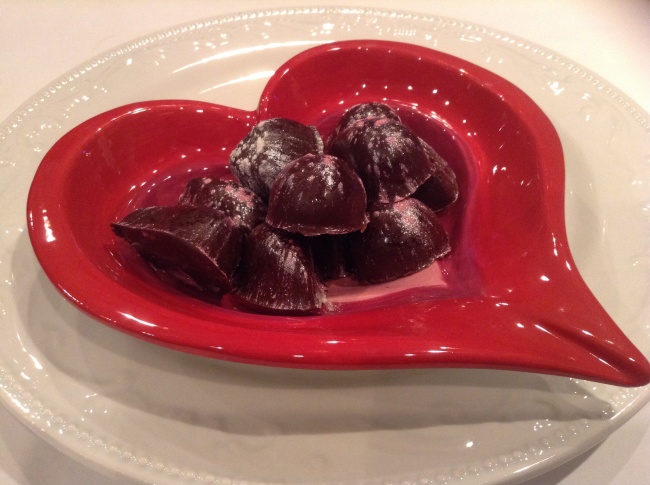
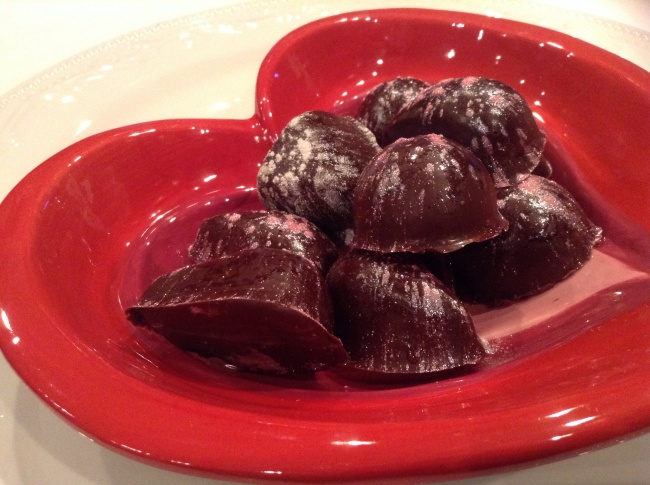
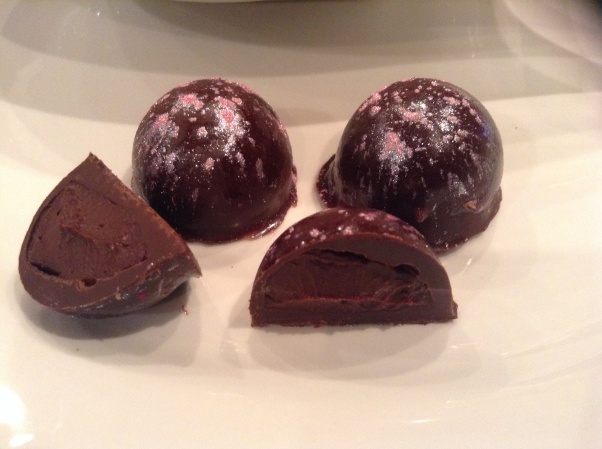
Homemade Chocolate Truffles


Image

In one post, I tried to offer a light substitution to hot cocoa, and in another I offer a recipe of chocolate truffles. Well, what can i say??? I love chocolate so much that I want to be able to enjoy it without guilt and sometime i have to find ways to cut down those calories that is why I posted the recipe of a light hot cocoa.

Chocolate is really one of my weaknesses. I love it, and need it at then end of my meal to satisfy my sweet tooth;-) I try not to indulge much because my trainer will fuss at me… But when I can indulge, then I want the real thing!!!

As a French person, I am  a bit of a snob and only eat European Chocolates. It is perhaps because the European Chocolates or truffles have a higher content of chocolate and taste like chocolate. Here in the US, my favorite is Godiva. The problem is that they are only sold in certain places and are quite expensive. Of course I could just buy some of the truffles already packages but they don’t exactly taste the best.  Well with Valentine’s Day around the corner and me stuck at home in a snow storm  I thought to make some truffles today. They are fun to make, and really not that expensive.

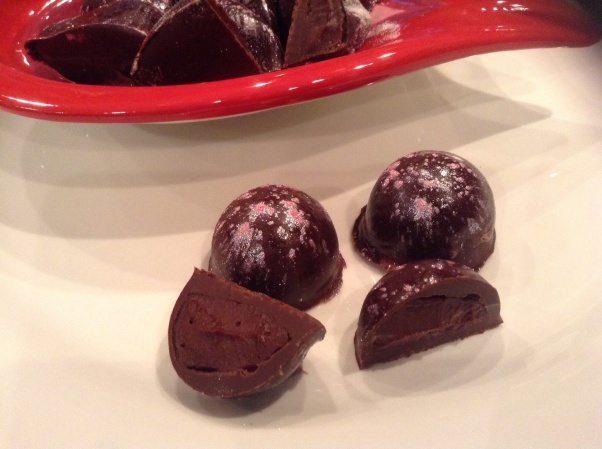
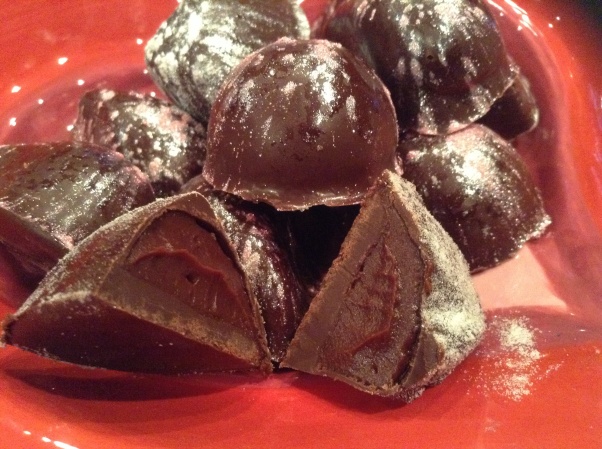
Real  truffles are not hard to make, they just require a mold, and patience. Truffles can come in many flavors, but most of the time the filling is made either with ganache, buttercream, or craquin.

Today I will offer you a recipe that is very easy and is bound to be liked by many.

Image

Ingredients for a tray of about 30 truffles:

  • 1 / 2 bag of ghiradhelli ( sweet, milk or bittersweet)
  • 100 gr. of chocolate chips
  • 100 gr. of cream
  • flavors of your choice ( 1/2 tsp of raspberry essence,  1/2 tsp of almond extract, and 1/2 tsp of orange extract)
  • Glitter for decoration

image

  1. Place the chocolate  in a microwaveable bowl and microwave the chocolate for 90 seconds or until the chocolate is liquid and free of lumps.
  2. With a brush, brush the inside of each indentation of the truffle mold. PLace the truffles in the fridge for the chocolate to cure.
  3. Rebrush the inside for another coat so that the truffles will not be too thin. Place the tray back into the fridge.
  4. Meanwhile place the cream into the microwave for 90 seconds and pour it over the chocolate chips,. Let it sit for a few seconds. Then with a small whisk, stir the cream to make a smooth ganache.
  5. Divide the ganache in 3 equal portions. Then add a few drops of the flavor that you wish. Today I used almond, orange and raspberry.
  6. Fill the ganache in the truffles. Then place them into the freezer to cure.
  7. Rewarm the chocolate and brush the top of each truffle to close them up. Place them back into the fridge to cure. decorate as you wish.
  8. To decorate them, I brush each truffle with clear vanilla syrup and sprinkle over them .image
  9. Et voila!

image

The truffles are wonderful to eat cold or at room temperature. Your turn to be creative!!!!

Bon Appetit and Happy Cooking!!!

Zucchini Butterfly- Papillon de Courgettes


photo

It is summer, and as such your garden or your grocery store should be filled with cheap but yummy summer vegetables: zucchini, Summer Squash, Corn, Tomatoes…

But what to do with them. Even me who eats lots of vegetables get tired of eating the same vegetable over and over again.

Zucchini is a prime example. How else can you eat it besides grilled, steamed and again grilled???

My sister-in-law makes zucchini muffins. They taste pretty good, but it is not something I want to fix with zucchini.

My sister shared this yummy recipe that make for great sides to any dish. Today I am using fresh zucchini, but you can certainly  substitute zucchini with any other vegetables.

Ingredients for 8, which makes 2 trays of 12 butterfly. 

  • 4 medium-sized zucchini or about 2 lbs of fresh zucchini
  • 4 eggs
  • 3/4 cup of heavy cream, half & half or milk
  • 1 cup of swiss cheese ( optional)
  • 1 tbsp of corn flour
  • 1 tsp of salt
  • 1/2 tsp of thyme, rosemary herb blend 
  1. Turn the oven to 350.
  2. Using a mandoline, or a hand grater, grate the zucchini and fill a bowl with them.
  3. Add to it, 4 eggs, 1 tbsp of corn flour, 1 tsp of salt, 1/2 tsp of thyme, and mix well.photo 1
  4. Scoop this content in the mold or container of your choice. Today i used the butterfly mold  (on special this month), but your could use a big muffin tray or even bake the whole thing in one big mold such as the sunflower mold.photo 2
  5. Cook for 30 minutes in small container, and 60 minutes in a large one.
  6. Serve those yummy butterflies with a dinner of your choice. Et voila!!!photo 3

Bon Appetit and Happy Cooking!!!

Shamrock Whoopie Pies


photo

Happy St Patrick’s Day everyone!!!

I hope you guys had a fun day today. Did you go party somewhere fun, and drink some green beer;-)

St Patrick’s Day sure looks like a lot of fun. Looking at picture of green tainted rivers, parades and green beer, it certainly looks like many people are having a great time. I hope one day I will get to see that too. It must be quite impressive to see a river green!! Do you think that I would enjoy this holiday even though I don’t like to drink beer.. Would that make a difference?

Well Spartanburg, SC, had nothing of that. It was a very quiet Sunday here. I certainly enjoyed the beautiful weather, and the warm temperature and  sure hope that Spring is here to stay!

So instead of celebrating St Patrick’s DAy like many of you, I celebrated mine in my kitchen trying to make Shamrock Whoopie Pies. Well they look more like Fleur de Lys Thank Shamrock, but I certainly tried.

And What do I think of them??? They taste great!!! Nothing like a fluffy and yummy French Pastry but they are pretty good:-) and they are easy to do:-)

Ingredients for 15 Whoopie pies:

  • 1/2 cup unsalted butter, at room temperature
  • 3/4 cup light brown sugar, packed
  • 1 large egg
  • 1 tsp vanilla
  • 1 T light corn syrup
  • 2 cups all-purpose flour
  • 2 T cocoa powder
  • 1/2 tsp baking powder
  • 1/4 tsp salt
  • 1/2 cup buttermilk, at room temperature
  • 1/2 oz. green liquid food coloring
  1. Preheat oven to 375 degrees. Prepare 2 large perforated sheets by placing a large silpat on two perforated sheets.
  2. In a mixer, beat the butter and the sugar on medium high-speed until it is light and fluffy.
  3. Add the egg and beat until it is well incorporated. Add the  vanilla and the corn syrup and beat about 30 seconds more.
  4. In a large bowl, mix together flour, cocoa, baking powder and salt.photo 1
  5. Add 1/3 of the mix to the batter and beat on low speed until it is just incorporated. Add 1/2 of the buttermilk and beat until just incorporated.photo 2
  6. Repeat step 5 until you have used all the dry mix and all the buttermilk.
  7. Add food coloring.Do not over beat.
  8. Transfer the batter to a piping bag fitted with a large round tip and pipe the dough onto the silpat by making shamrocks.photo 3
  9. Place the perforated sheet into the oven and bake about 6 (if on a silpat and perforarted sheet),  otherwise 8 minutes or until the cookies are set.photo 4
  10. When cooked, let them cool on the perforated sheet.
  11. Meanwhile prepare the filling.

Ingredients for the filling:

  • 1 jar of marshmallow paste
  • 1 stick of butter at room temperature
  • 3/4 cup of sugar
  1. Place all the ingredients into a mixer and beat until it becomes thick.
  2. Spoon the filling into a pastry bag and pipe the filling onto a whoopie pie.photo 5
  3. Place a top on each whoppie pie et voila!!!

photo

Bon Appetit and Happy Cooking!!!

Little Pot Of Gold…


photo 1

With St Patrick’s Day around the corner, I have been scratching my head to come up with some fun recipes for this special day. There is a million of things that came to my mind, but today with the time that I have, this is what I came up with: Little Pot of Gold. I hope that you will enjoy them. They are fun to make, easy to create and so so yummy for your tummy;-)

Ingredients for 12 pots of gold:

  • 1 pack of dark chocolate cookie dough from Nestlephoto 1
  • 12 Reese cups/ or dove milk chocolate
  • 6 caramels cut in 2. 
  1. Refrigerate the dough before using so it is will much easier to use.
  2. Turn the oven to 350.
  3. Place a roulpat on your counter. Detach a cookie from the cookie log and with the palm of your hand, press down  on it to make it flat.photo 2
  4. Place this flattened cookie inside the opening of a mini cupcake mold that you would have placed on top of a perforated sheet.
  5. Repeat this process with all the chocolate cookies.
  6. Place a reese cup or a dove chocolate inside the cups.
  7. Cut the caramel in half and with a rolling-pin, roll the caramel down to make it flat.
  8. Place one on top of each Reese cup or dove chocolate. photo 3
  9. Place the mini muffin try into the oven and cook the cookie cups of 9-11 minutes ( 9 to keep them soft, 11 to have firmer cups).
  10. When the cups are cooked, remove the tray from the oven and cool completely.
  11. To serve, place the little pot of gold next to gold coins for a fun display;-)

photo 2

photo 3

Bon Appetit and Happy Cooking!!!

Snowman Pretzels Sticks


photo

This morning as I awoke, I saw heavy snow falling. I love snow.

In a normal day I would have not minded having snow falling but since I was to do a cooking class at noon, I was hoping that the snow would not stayed… luckily it did not, and the cooking class took place.  But this snow and this nasty weather just made me want to stay in the comfort of my home this afternoon to play in my kitchen.

Since I was not going to be able to make snowman in real life, I decided I would make them inside my home;-) and made those yummy snowman pretzels.

I found this recipe on Disney…

Ingredients:

  • 1/2 of a vanilla flavored chocolate covered
  • gun drops
  • fruit roll up
  • a few mini chocolate chips for the eyes
  • orange sprinkles
  • a bag of pretzel sticks.
  1. Place the chocolate in a microwave safe container and cook the chocolate for 90 seconds. Stir.
  2. Cook for another 30 seconds, stir and repeat this process until the chocolate is perfectly melted and liquid.
  3. Dunk each pretzel stick into the chocolate and place the chocolate covered pretzels on a silpat.
  4. Quickly place 2 mini chocolate chips for the eyes, 1 orange sprinkle for the nose, and 2 for the buttons of the coat.
  5. Let the chocolate cure.
  6. When the chocolate is completely cold. Cut with scissors a small string to make the scarf.
  7. Take a gum drop of your choice. Cut one hand and with your thumb, push the small slice down to make it flat and larger.
  8. Place it on the end of the pretzel stick and glue it with a bit of chocolate.
  9. Attach the other part of the gum drop with a bit of chocolate. Et voila!!!
  10. Make as many as you want….

Bon Appetit and Happy Cooking!!!

Valentine’s Cookie Cake


photo

It has been fun to see Lisa, my daughter playing in the kitchen and to see her cook. She loved the football cookie cake so much that she has been baking cookie cakes ever since for no reason. Well today this is what she made, for us:-) What a sweet surprise!!!
Ingredients for a large cookie cake in shape of a heart:

  • 1 can of chocolate chip cookie dough ( about 12 oz.)
  • 1 can of pink icing.
  • 1 can of red icing

photo

  1. Turn the oven to 325.
  2. Empty the content of the cookie dough onto the heart shape cookie pan ( I bought this one from the Demarleathome Website, but they are no longer available;-(
  3. With your fingers, press the cookie down all over the pan.
  4. Cook the cookie for 15 minutes ( depending how you like your cookies- I like mine soft so i cooked the cake for 13 minutes).
  5. Let the cake cool completely.
  6. Decorate as you wish.

Bon Appetit and Happy Cooking!!!